Monday, July 9, 2012

Favorite new material


PRINTABLE FABRIC

I purchased a new item, that claimed to be printable fabric with an inkjet printer. I bought it with intentions of ironing a design onto a piece of stretched canvas. The printing came out great. I let it dry for 24 hours only because I was at work.
You peel off the backing and rinse off the fabric for about 30 sec. Dry with paper towel and iron flat. Was hoping once ironed it would be able to adhere to the canvas, but no such luck. The fabric sheet has no adhession.
Will have to adjust the project a bit, but love the idea of printable fabric. I wish I knew about it before printing menus for a bride on tea bag dyed fabric, that was huge pain. (see the EVENT Tab to see what I am talking about)

Can't wait for the next project idea to use the printable fabric again!

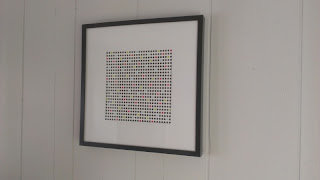
Beginning phase of my creative Artwork. Listing all the
places Mike and I have vistied together.

Friday, July 6, 2012

The 'Man' Room

When the Cat is away..the mice will play!

While Mike was away for a Haz-Mat Training this past Feburary. I decided to take over his room. It was one of the only rooms in the house that hadnt been updated or painted. With the three bedrooms, we agreed one would be his to make a mess and do what he wanted with, one was mine that we use as a guest room and the other is our master bedroom.

I created a Sketch-Up model to help lay things out.
The room had a nicer wooden framed futon, an old dresser and a bunch of tubs with his misc. things he had brought from his parents house.

He is a professional Firefighter and loves it. So without making it too "themey" and painting it red or chrome, with help from my sister we introduced a calm green. (Green Tea- Behr)

3D Rendering Model - Done in Google Sketch-up before the
 project started to make sure it was all going to work out!

To cover up one of the wood armrests of the futon, I built and
upholstered a faux leather headboard. Really gives it more of
 a bed feel, rather than a futon.
With bits and pieces of his firefighter memorablia, I used
them as art pieces around the room. Sewed a maltese cross
applique onto a handmade pillow.

Inexpensive black plastic cubes were used for the night
stand. A free TV and TV stand were from friends that didnt
 want them anymore. The old dresser got a coat of black
paint and left over faux-leather from the headboard was
used to make tie-backs for the panel curtains.


It was a fun project, especially knowing it was a surprise when Mike returned home. He loved it and was completely surprised that we got it all done while he was away. Though it is still his room and it doesnt look as clean anymore. It beats the dulled ivory walls with royal blue trim.

Thanks to Katie for helping me paint and attempting to hand saw 3/4" finished grade plywood for the head board and Jared for helping us to actually cut the board to the proper size. Thank you to Caitlin for her expertise in sewing appliques to pillows!

Costs of the project were:
2 gallons of Green Tea Paint - $48
1 Gallon of white paint for trim - $23
Panel curtains - $27
picture frames - $30
Black cubes - $28
Ivory throw for bed - $38
Total just under $200


My version of 'While you were out'...COMPLETED!

Thursday, July 5, 2012

Simple Art piece

Now that I have begun to introduce color into our breezeway to make it feel more cozy.
I had two picture frames that we used at our wedding, that I knew I would be able to reuse somewhere in the house.

I took one 20" x 20" frame which was about $20 and it came with the mat and bought a piece of 12"x12" scrapbook paper that you can pick up at any craft store. With a fiew small pieces of tape to hold the paper in place within the mat and I got a fun and inexpensive piece of 'art' to hang anywhere.


The added bonus, when you get sick of looking at that pattern, you can go buy a different piece of scrapbook paper ($0.50-$1.00 a piece) and change it out.

Ever Changing Art...Love it!

Good Morning Sunshine Yellow!

I love having a fireplace mantel in our living room. It is very easy to change out accent pieces and make it a colorful and decorative focal point in the room. Whether it has stockings hung during Christmas, or some Valentine Flowers, it is always changing.

Since we are changing out the dark reds in the living room, why not introduce that color on the mantel? With simple 3x6 candle holders (Dollar Store) reused from our wedding and the sunshine yellow candles I ordered online for about $5 a piece, a bouquet of silk yellow flowers on sale for less than $10 and a teal glass bottle for $4.99...TA-DA, instant 'face-lift' for about $30.


Now I am thinking maybe changing out the vacation photos we have hanging,to something a little more vibrant...what shall it be?

Sunday, July 1, 2012

Amazing what some color can do!

After having burgundy and red as the accent color in our living room, I learned from Mike that the space is too dark. With the 'Wheat Bread" Behr paint on the walls and white trim, original wood floors and black and dark brown furniture, we agreed it was time to add some color into the space to brighten it up.

The cheapest way to splash in some color was to cover the original red pillows with handmade pillow colors that will begin to introduce our new color palette of sun yellow and teal.

I had to just purchase fabric as I used all the existing pillows. There is a simple way to sew the pillows without needing zippers, button, snaps...etc. and are easily removable for washing.
 (if interested in learning how, contact me @ tallgirlstudios@gmail.com.


1 yard of each Purchased:
Solid Teal at $4.38 a yard
Yelllow Pattern $7.98 a yard
both from Fabrics.com

Teal Pattern from Jo-anns on clearance for $9.99 a yard
Before- thought the fireman would like the red :(

The new bright spring colors really add a nice punch!

The red pattern - GONE!
Welcome to the new teal pillow!

With some of the remaining pieces of fabric, I am thinking to use them as curtain tie backs or maybe a framed art piece, check back to see what I do.

The Bench is complete!

Well after a few coats of white spray paint and finishing up the seat cushion the free bench is beautified. With the splash of color it really brightens up the breezeway into our kitchen. With a few more accessories, it will be an additional comfortable space for people to hang out in.


The finished bench in it's glory.


Now I need to figure out what to do with the sad red painted concrete floor!

Friday, June 29, 2012

TIP of the DAY - 06/29/12

Pinterest Lovers
Help out your event photographer by giving them not only a list of desired photos that you would like taken. Why not use technology and create a board that you can pin some of your photo inspirations and send it to your photographer. Its obvious that photographers are visual people, so a 'photo album' may be more useful than a typed out wish list.